How to Publish Research Paper on PCSHS Virtual Library Website

Publishing your research paper on the PCSHS Virtual Library Website is a straightforward process designed to make your work accessible to a wider audience. This guide will walk you through each step, from preparing your manuscript to submitting it for review. You’ll learn about formatting requirements, submission guidelines, and tips for ensuring your paper meets the necessary standards. Whether you’re a seasoned researcher or a first-time author, this resource will help you navigate the publication process with ease

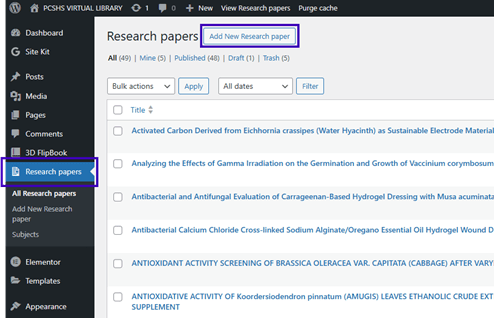
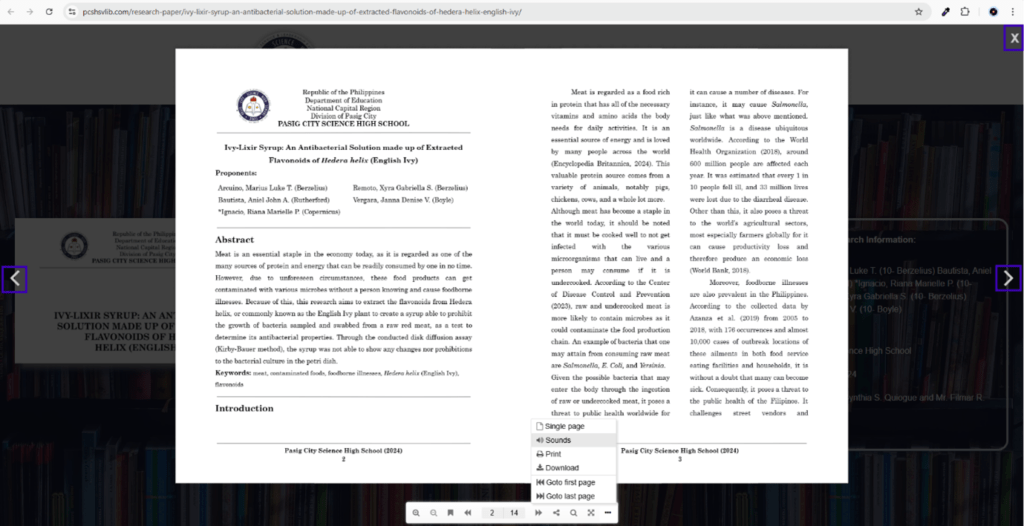
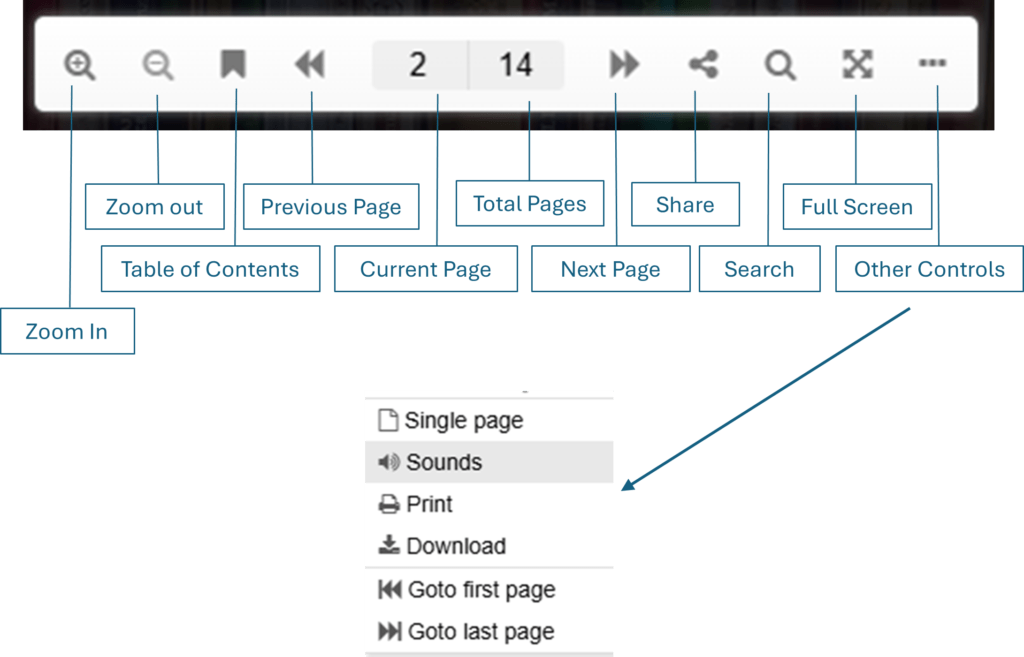
There are several steps in publishing a research paper in PCSHS Virtual Library since we are using a special plugin 3D Flip Book. Below is a simple diagram on doing this.
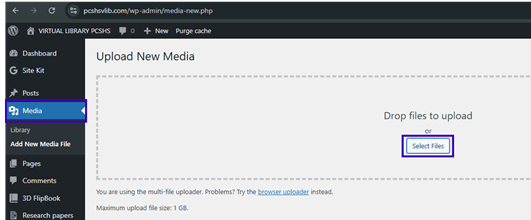
MEDIA UPLOADING

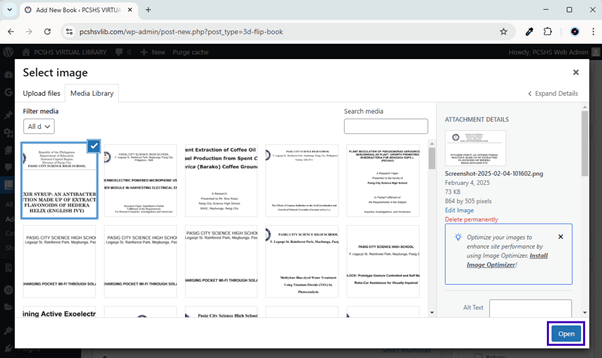
In media uploading two media files are required:

  • Research Paper in PDF format
  • Front page of the Research Paper with its Title and needed information in PNG format (sample image below). Required image size should be 454X254 pixels. This will serve as a Thumbnail Image for 3D Flip Book and Featured Image for Research Paper.

So here are the steps on how to upload media in WordPress. You have to login in WordPress dashboard to do this.

  1. To upload this media, in WordPress Dashboard and, go to the Media section and click Add New Media Once in the page click Select Files.

  1. In the dialog box, select the file you want to upload. To select multiple files, hold down the Shift key (for PC users) or the Command key (for Macintosh users).

  1. Click the Open
  2. When the upload is complete, a field with your file details appears. Below the field, click Save all changes.

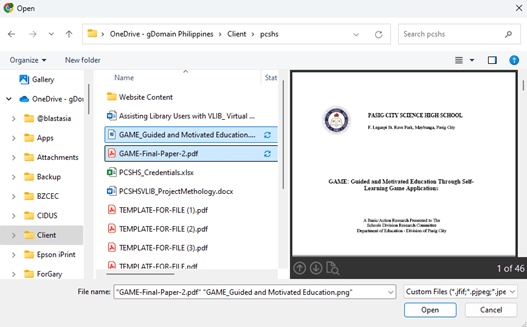
NOTE: Be sure to have a list of the filenames of the Research Paper and Images that you have uploaded so that it will be easy to call them on the next step on publishing research papers in WordPress.

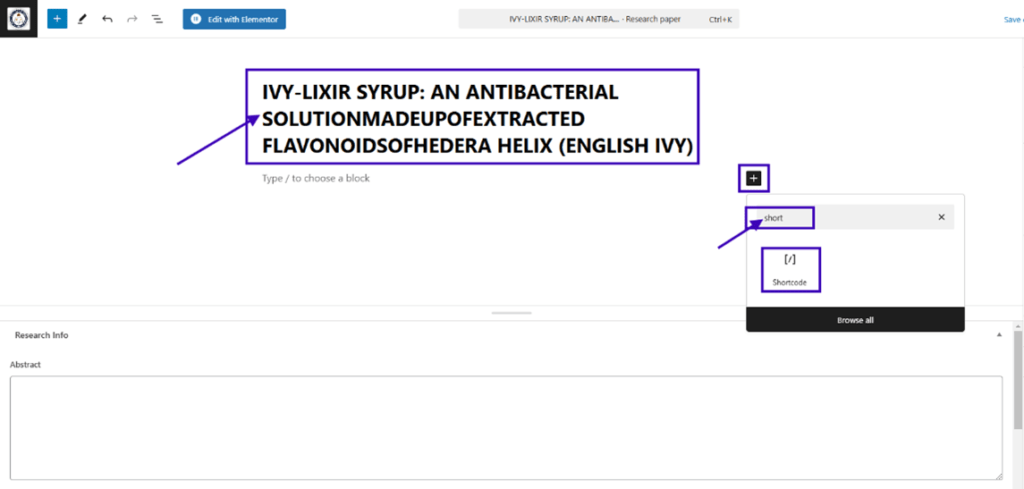
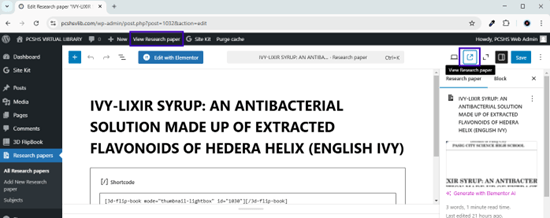
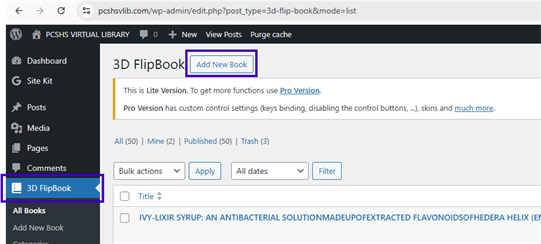
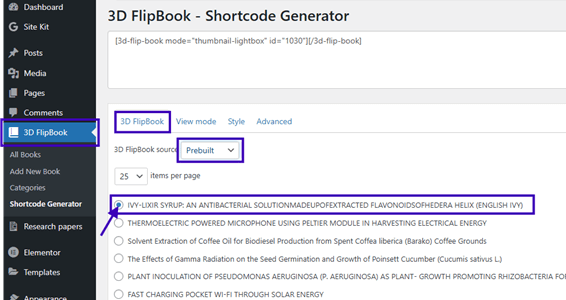
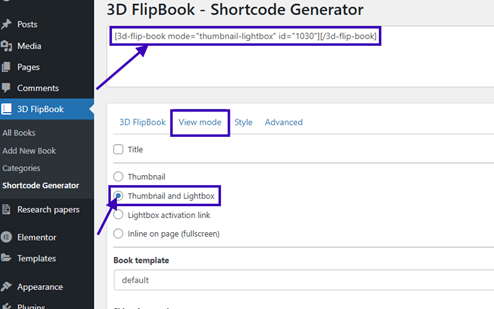
3D FLIP BOOK CREATION

  1. In WordPress Dashboard go to 3D FlipBook then click Add New Book.


  1. In the Add New Book page type in the Title of the research paper.


  1. From the image above click Select thumbnail, the Select image page will open with the Media Library listing all the uploaded media. Select the appropriate thumbnail image for this flipbook then click Open.


  1. The image shown below reflects the thumbnail selected above. Next will be the selection of the research paper in PDF. Click Select PDF.


  1. The Select PDF page will appear with the Media Library listing all the research paper that has been uploaded. Select the appropriate media for this research paper and click Open.


  1. The page will return on to the Add New Book page and will show that on the Source field the selected PDF is now reflected we can now Publish the research paper.


  1. To view the created 3D FlipBook we need to generate a shortcode that we will use in the stage of publishing a research paper. Click Shortcode Generator under 3D FlipBook in WordPress Dashboard Menu. Use Prebuilt in the 3D FlipBook Source then select the title of the 3D FlipBook that we will use on the next stage.


  1. In View Mode select Thumbnail and Lightbox this will automatically generate a shortcode as seen in the 3D FlipBook – Shortcode Generator field box. Copy this shortcode because we will use this on the next stage.


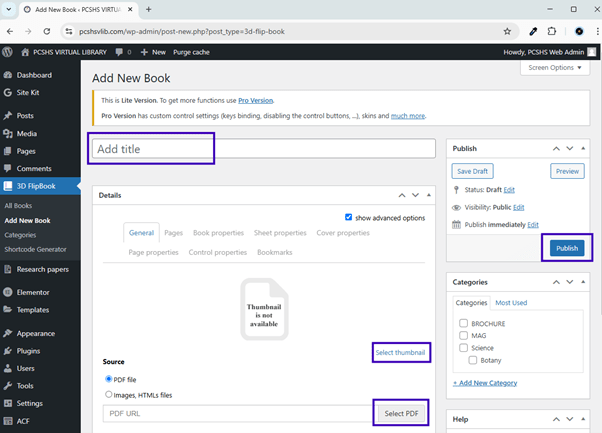
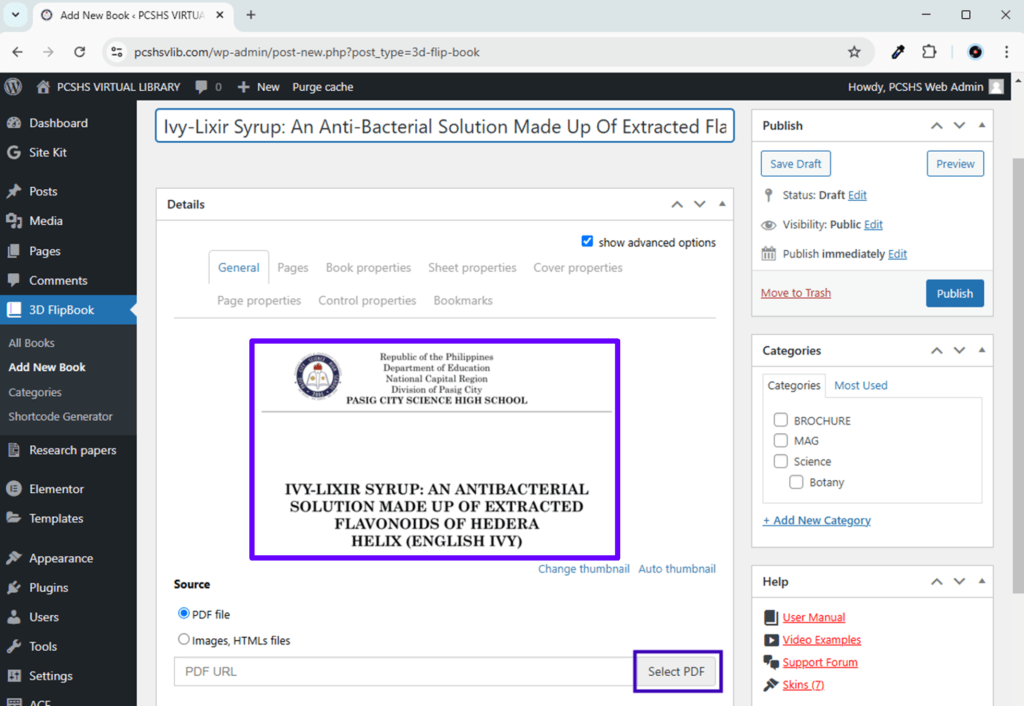
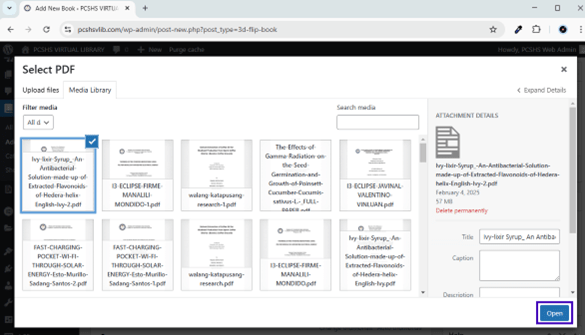
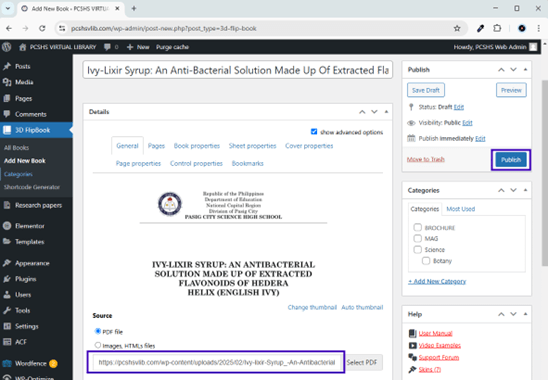
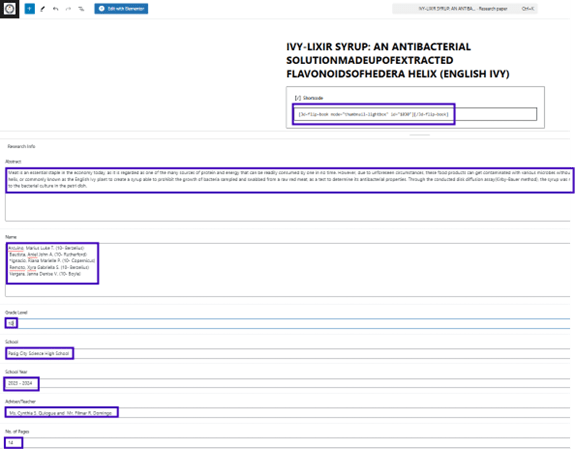
RESEARCH PAPER INFORMATION ENTRY

This data entry provides additional information about the Research Paper and below are the fields of information in the said section.

  • Abstract – overview of the book
  • Name – students who worked on the research paper
  • Grade Level – education level of the person/people who worked on the research paper
  • School – where the students are studying when they worked the research paper
  • School Year – when was the research paper were made
  • Adviser/Teacher – under the supervision of
  • of Pages – number of pages contained in the research paper


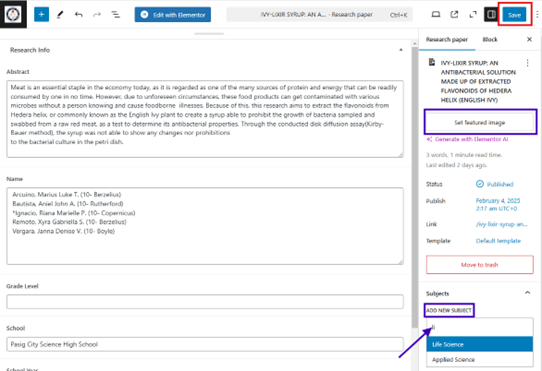
The above information in not part of the 3d FlipBook plugin that is why we use Advance Custom Field to create the above data fields.

  1. In WordPress Dashboard, go to Research Papers and click on Add New Research Paper.


  1. The Add New Research Paper page will open, on Add Title field type in the title of the research paper that you are working on. At the Type / to choose a block click the + sign and type shortcode in the Search Area and then select [/] ShortCode.


  1. In the ShortCode field enter the shortcode generated from 3D FlipBook and then enter all the other information that was mentioned above which is shown in the image below. If a particular field has no information just leave blank and it will show blank in the page.


  1. Then set the Featured Image for this Research Paper. Featured Image is the same as Thumbnail image in 3D FlipBook. Click Set featured image and it will take you again to the Media Library page from there select the image appropriate for this Research Paper.


  1. Last part is select what Subject this Research Paper fall onto. Just type in the Add New Subject field and it will list all the Subject that we previously created. Once done click Save. Then we are ready to view the Research Paper that we have created.
  2. There are 2 ways to view the created Research Paper, click the View Research Paper at the top bar or click the button at the right-side bar. And the page will display on another tab.


  1. This is the final view of the Research Paper wherein the 3D FlipBook link is at the first column of the page while the Abstract of the Research Paper is at middle and all the Research Information at the last column.


  1. To read the Research Paper just click on the 3D FlipBook link in the first column and the PDF will open like you are opening a book with audio. To flip on the next page just click the Next Page Button >, for Previous Page press < To close the book, click X button.
  1. For PDF button control here are the available buttons.


Need help?

We’re here to assist with any questions about publishing your research paper on the PCSHS Virtual Library Website.